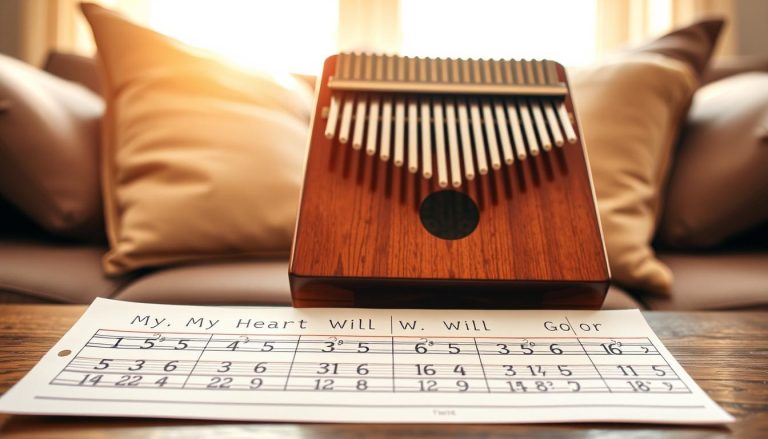
Goal of this guide: to make a lyrical version of the theme accessible on a 17-key thumb piano. You will learn step by step how to prepare and tune the instrument, read tablature, and work on the rhythm.
What does simplifying mean? It means reducing the number of notes played at once, using repeated patterns, and lightening the accompaniment played with your thumbs. The result remains faithful to the theme while being easier to memorize.
This guide shows the notation for 17 keys and offers advice that works for most tunings. The steps cover preparation, tuning, reading, playing techniques, and ways to achieve a more musical sound.
A realistic goal: after a few hours of practice, you will be able to play a smooth, recognizable version, with your right hand carrying the melody over a simple harmonic foundation.
At the end of the article, you will find sheet music, tablature, and suggestions for pieces to help you keep developing your skills and play regularly.
Why Canon in D sounds so good on a 17-tine kalimba
Its repeating pattern makes the musical phrases easier to learn and remember. The repeated structure and steady harmonic progression create a continuity that quickly becomes familiar to the ear.
On a thumb piano, alternating left and right around the central tine makes repeated patterns easier to play. This helps beginners master rhythm and thumb coordination.
As a learning piece, this tune is especially useful. It encourages consistency, steadies the tempo, and develops your ear for resonance. You also work on a clean attack and sustained bass notes.
We keep the essentials of the theme: a recognizable lyrical line and a sense of layered harmony. Some voices are reduced, however, and fast passages are replaced with more accessible patterns.
- Aim for a clean, steady performance rather than a complete reproduction on your first attempt.
- Focus on short repeating phrases instead of trying to read long passages from the start.
To discover other easy songs, explore short sequences that strengthen your grasp of patterns and thumb independence.
What you need before you start playing
A little preparation will save you hours of practice time. Having your equipment ready prevents interruptions and helps you concentrate from the first minute.
Essential equipment and visual markers
To get started, have a 17-key kalimba, a tuning hammer, a tuning app, and note markers, either engraved or in sticker form.
Stickers make the keys quicker to identify. They reduce mistakes when you follow tablature and build beginners’ confidence.
Location, audio, and useful accessories
Choose a quiet place where you can hear the resonance and notice notes that blur together or sound out of tune.
Before playing, start an audio recording (on YouTube or a streaming platform) to absorb the theme’s pulse and set the tempo.
In France, consider a carrying case and a cloth, and perhaps silicone thumb guards to protect your thumbs and help avoid knocking the instrument out of tune.
A simple rule: spend five minutes preparing (tuner ready, markers visible, recording accessible). This small ritual makes every practice session more productive.
Tuning your kalimba to play in tune
Stable tuning is essential: without it, even good tablature sounds wrong. Tuning ensures that each note fits with the others and preserves the beauty of the repeated patterns.
Choosing a reliable tuner helps you tune the kalimba quickly. Try an easy-to-read app such as Smart Kalimba, gStrings, or Free Universal Tuner. Place your phone near the tines and let the reading settle.
Letter names and notes: C = do, D = re, E = mi, F = fa, G = sol, A = la, B = ti. Some scores use numbers; knowing both systems prevents confusion.
- Start with the central tine and check its note.
- Work outward, tine by tine, checking the tuner as you go.
- Check again if several tines have shifted.
To correct the tuning, use a tuning hammer: if a tine is too sharp, gently tap it downward. If it is too flat, tap it upward. Make small adjustments and check again after each tap.
- Routine to prevent tuning problems: check three or four reference notes after transporting the instrument or a change in temperature.
- Avoid hitting too hard or trying to fix everything at once.
- If a tine shifts, check it again before playing.
For exercises and other easy songs, explore these resources and check the tuning before each session.
Holding the instrument properly for a clear sound
A good grip lets every note ring clearly and for longer. Here is how to position your hands for a full, steady sound.
Hand position and the role of your thumbs
Hold the instrument in both hands with the tines facing you. Rest your thumbs above them, ready to pluck; your other fingers support the back of the instrument.
Your thumbs produce the attack. Use your nails or thumb pads, whichever feels natural. Aim for a clear attack without tension so you can move smoothly between patterns.
Finger placement and relaxation
Keep your shoulders down and your wrists relaxed. Light pressure is enough: resonance does part of the work. Breathe and let your fingers support the instrument without squeezing it.
Keep the holes uncovered
Avoid covering the two rear holes: doing so reduces volume, clarity, and sustain. Leaving them open preserves the natural resonance.
With experience, you can use the holes to create an effect (vibrato or wah-wah) by partly covering and uncovering the cavity.
“A simple test: play three notes while holding the instrument properly, then play them again with the holes covered. You will hear the difference immediately.”
To improve, consult resources and free sheet music, and repeat this check at every session. It will help you play the kalimba more confidently and master the instrument.
Understanding the note layout on 17 tines
The keys follow a zigzag layout that guides your thumbs from the first measure.
The left-right alternation begins at the central tine: the reference note is in the center, and the scale extends alternately to the left and right. This movement affects fingering and coordination.
To picture it, remember that the next note is not necessarily beside the previous one on the same side. It is often in a mirrored position on the other side of the instrument. Reading a score becomes more intuitive once you know this principle.
Finding the keys quickly
First identify the central tine. Then mark five to seven important notes with stickers or engraved markers. These markers speed up reading and reduce hesitation.
- Practice playing slowly up the scale, alternating sides, then come back down to memorize the note layout.
- Follow this short routine: slow ascent → pause → quick descent. Repeat it for two minutes per session.
Watch out for a common mistake: do not confuse a tine’s physical position with its note name, especially if you change the tuning. Always check with a tuner before using a score.
Canon in D on the kalimba: simplifying the melody for 17 tines
Before arranging the tune, identify the range that sounds best with your current tuning.
Choose the most comfortable key
Start with your instrument’s actual tuning and avoid ranges that are very high or too low. This produces even resonance and makes sustained playing easier.
Reduce the left hand to the essentials
The left hand should provide the harmonic foundation. Favor long, repeated notes. They support the melody without making the texture too dense.
Keep the right hand lyrical
The right hand carries the main melody. Aim for a clear, even line. Always give it priority if the arrangement feels crowded.
Adapt fast passages
Turn cascades of notes into short patterns of two to four notes. Repeat these phrases to preserve the musical shape while reducing the difficulty.
Use simple chords
Replace complex sequences with two-note chords. They suggest the harmony without overworking your thumbs.
A practical method: isolate four measures, find the lyrical line, and decide which accompaniment notes are essential. If it sounds too busy, remove the accompaniment, keep the melody, then bring back a steady bass note.
| Goal | Action | Expected result |
|---|---|---|
| Choose the key | Try two or three options | Even resonance |
| Left hand | Long, repeated notes | Stable harmonic foundation |
| Right hand | A clear line that takes priority | Easier reading |
| Fast passages | Short, repeated patterns | Easier playing |
| Chords | Two simultaneous notes | Suggested harmony |
Kalimba sheet music and tablature remain useful guides. Adapt them so the arrangement flows and you can play without tension.
Reading Canon in D kalimba tablature without getting lost
Effective reading involves three actions: locate, listen, and break down. This short guide explains how to follow a visual grid and keep the rhythm without stress.
When to choose tablature or sheet music
Tablatures are visual and direct, ideal for learning quickly. Sheet music accompanied by tablature combines standard notation with visual markers; it helps you improve your music reading.
Follow the grid from bottom to top and keep time
First find the representation of the keys on the page. Then read from bottom to top in most layouts.
Listen to the recording, tap the beat with your hand, and play slowly. Keep a steady rhythm before speeding up.
Break it down to memorize it quickly
Work in short sections of one or two measures. Repeat each segment until it becomes automatic, then join the segments together.
Try several sources: free tablatures often offer both simpler and more detailed versions. Choose one that suits your learning needs.
To find sheet music and tablature and enrich your practice, explore this resource: sheet music and tablature.
Reading kalimba sheet music with numbers beneath the notes
Pairing numbers with musical symbols makes reading faster and less intimidating.
Understanding the staff and the numbers
The staff shows the musical structure. The numbers beneath the notes correspond directly to the tines. They tell you which tine to play without having to convert the note name.
To begin, identify the measure, then read the numbers. Find the important numbers and compare them with the visual markers on your instrument.
Reading chords and closely spaced notes
Two notes stacked on the staff should be played at the same time: they form chords. Aim for a balanced sound by playing both keys together without damping their resonance.
When several notes follow one another closely, they form a fast sequence. Practice these passages slowly, then increase the speed.
“Isolate the lyrical line if the accompaniment becomes too much to manage.”
This technique means keeping the melody while reducing the harmonic accompaniment when the whole arrangement is too dense.
- Read two measures.
- Play them slowly five times.
- Play them five times with a metronome.
To discover other easy scores, always adapt your reading to a comfortable way of playing.
Practicing the rhythm of Canon in D methodically
Before placing your fingers, let the rhythm of the piece sink in. Listening first makes learning easier: notice the pulse, accents, and length of the bass notes.
A steady rhythm immediately makes a simplified version more musical. Listen actively: count the beat, identify the strong beats, and imagine playing the bass notes.
Metronome method: start very slowly, aim to play without mistakes, then increase the tempo in stages. Keep your thumbs relaxed; if your hand tenses up, slow down.
Looping tip: isolate a difficult measure. Repeat it 20 to 30 times, then add the measures before and after it. This repetition makes a short passage automatic without overloading your attention.
- Listen to the piece two or three times.
- Practice slowly with a metronome.
- Loop the passage until it becomes automatic.
“Speed comes from consistency, not force.”
This method improves your practice, helps you play the whole piece without stopping, and produces clean resonance and a clear melody.
Playing techniques to make Canon in D more musical
A few focused techniques add shape to the phrases without making the piece harder to play. Musical expression comes from clear articulation, a balanced sound, and subtle effects.
Move smoothly by alternating thumbs
Choose fingerings that avoid big jumps. Practice alternating left and right slowly until the movement feels fluid.
Repeat the transitions at a slow speed, then raise the tempo in stages.
Play harmonious chords
For a balanced sound, play two keys at once and aim for an even attack. Do not force it: let the resonance develop.
Vibrato and modulation
Vibrato is created by gently covering and uncovering the sound holes while a note rings. Use it sparingly on long notes.
Wah-wah effect
On a resonating box, vary how much of the front hole (and, if appropriate, the rear holes) is open to create a more pronounced effect.
“Harp” glissando
Sweep your thumb across several tines to create an arpeggio-like transition. Outward glissandos are often easier.
A practical rule: add one technique at a time (vibrato or glissando), steady the rhythm, then combine them.
Common mistakes when adapting Canon in D for 17 keys
Adapting a theme to an instrument with a limited range calls for clear choices. Otherwise, problems can build up and weaken the result.
Confusing melody and accompaniment
A common mistake: trying to play the lyrical line and a dense accompaniment at the same time.
The result: too many notes, no room for the music to breathe, and less clarity.
A simple test: if the rhythm breaks down or your thumbs tense up, lighten the accompaniment before adding anything else.
Playing too hard and losing resonance
Striking the keys too hard makes the tines click and the sound harsh.
Favor a gentle attack. Natural resonance comes from vibration, not force.
Neglecting tuning and wondering why it sounds wrong
Often, one poorly tuned note is enough to make everything sound wrong.
Check the tuning after transporting the instrument or a change in temperature. One or two misadjusted tines affect the whole piece.
“Slow down, simplify, check: the solution is often straightforward.”
- Check three reference notes with a tuner.
- Slow the tempo and loop one measure.
- Lighten the left-hand accompaniment and try again.
These steps are a normal part of the experience. With short, regular practice, you can make clear, lasting progress.
Useful free sheet music and tablature for progressing beyond Canon
Well-organized resources speed up learning. Look for sites that clearly sort pieces by instrument and level. This saves you from spending time on arrangements that are too difficult.
Where to find reliable online libraries
Instruments du Monde has an entirely free “Sheet Music and Tablature for 17-Tine Kalimbas” section. It includes familiar pieces such as “Comptine d’un autre été,” Interstellar, Zelda, and other film themes.
Suggested path and pieces to practice
After your first piece, choose two works focused on fluidity: Amélie Poulain and Interstellar. Add a piece focused on rhythm, such as one from Zelda, to vary the skills you practice.
A practical tip for improving
Always compare several arrangements of the same theme: start with a simple version (melody only), then move to one with chords.
“Progress in stages: simple version → chords → rhythm.”
- Keep your sheet music and tablature together in a paper or PDF folder.
- Write down your target tempo, difficult sections, and the date to revisit them.
- Review regularly and reassess your priorities.
| Resource | Type | Benefit |
|---|---|---|
| Instruments du Monde | Sheet music and tablature | Free, sorted by instrument and difficulty |
| Public music libraries | Sheet music | Wide selection, published editions |
| Specialist forums and blogs | Tablature | Varied arrangements and advice from players |
A one-week practice plan to master your simplified version
Planning seven short sessions helps establish the movements and steady the tempo. This program focuses on consistency, clear goals, and targeted exercises.
Short sessions, consistency, and goals for each section
Duration: 10 to 20 minutes a day. Aim for quality rather than quantity.
- Day 1: tuning and finding the notes.
- Day 2: right hand alone, one loop played cleanly.
- Day 3: simplified left hand, long notes.
- Day 4: join sections slowly, two measures without a pause.
- Day 5: practice with a metronome.
- Day 6: musical expression, chords, and subtle effects.
- Day 7: record yourself and consolidate.
When to move from tablature to playing from memory
Set the tablature aside as soon as you can play two to four measures smoothly. Play them without looking at it, then consult it only for the next measure.
Then check a score to refine the note lengths and rhythm. This helps you understand the structure and how the phrases connect.
How to record yourself to correct notes and rhythm
Record yourself on your phone. Listen for just one thing to correct at a time: first rhythm, then notes, and finally dynamics.
“Correct one thing at a time: rhythm → notes → dynamics.”
| Day | Practice focus | Goal |
|---|---|---|
| Day 1 | Tuning and finding notes | Stable notes |
| Day 4 | Joining sections | Two connected measures |
| Day 7 | Recording | A more polished version |
To learn more about a complete approach, see this resource on a learning method. For more ideas for melodic sequences and harmonies, you can also learn about other arrangements.
Conclusion
To stay on track, follow clear steps and practice every day.
Prepare and tune the instrument, hold it with relaxed hands, understand the tine layout, then simplify the theme by giving priority to a lyrical line.
Switch between resources: start with tablature to make quick progress, then consult a score and work on note lengths. Move on to other familiar melodies and songs.
Keep up a routine of tuning and checking the instrument so it continues to sound right over time. Then explore effects and techniques (sound holes, transitions, articulation) a little at a time.
With just a few minutes a day, your kalimba can become a true companion on your musical journey.