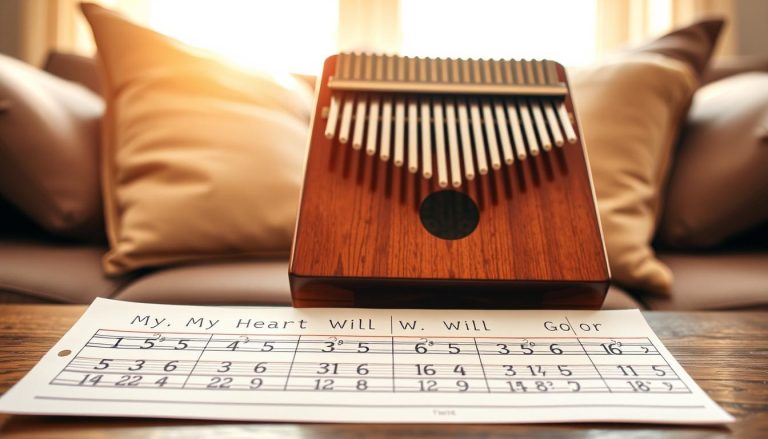
Discover this thumb piano: this small musical instrument offers all 12 notes in each octave thanks to its double row. You can play in any key without retuning. This guide offers a practical way to start today, even if you cannot read music.
What are the benefits? The chromatic version immediately expands your options: more ornaments, chords, and harmonic colors than a diatonic model.
Learning path: discover the instrument, learn how to hold it, prepare and tune it, play one note at a time, form chords, learn chromatic techniques, then follow a practice plan. You can begin on the main row and add accidentals at your own pace.
Keep your expectations realistic: more tines give you more options, but also more positions to remember. Regular practice is more effective than occasional long sessions.
To learn more, see everything you need to know about this instrument.
Understanding the 34-tine chromatic kalimba and its musical value
Small, portable, and surprising, this instrument follows the logic of a keyboard but is played with the thumbs. It is sometimes called a “thumb piano” because its layout resembles a piano’s white and black keys.
A thumb piano that lets you play in every key
Key advantage: the chromatic version includes accidentals. You can change keys without retuning. This is useful when accompanying a singer or changing key in the middle of a piece.
Chromatic and diatonic: what is the difference?
The difference is simple: the chromatic scale has 12 notes per octave, while the diatonic scale has 7. The five added accidentals allow chromatic passages, grace notes, and harmonic tension.
What an extended range changes
With 34 or more tines, the range supports longer melodies, richer accompaniment, and arrangements with several parts (melody, bass, and chords).
“Front row: diatonic foundation. Back row: color and accidentals.”
| Advantage | Use | Musical effect |
|---|---|---|
| Extended range | Long melodies | Less transposing |
| 12 notes per octave | Easy key changes | More harmonic colors |
| Double row | Chords and multiple parts | Richer accompaniment |
Next: the instrument’s potential becomes clear when you explore chords, key changes, and styles that often use accidentals.
Who this model suits in France: motivated beginners, composers, and performers
This model suits curious newcomers as well as musicians looking for an instrument that can grow with their skills.
Who it is for: motivated beginners who want room to develop, musicians with some experience on piano or guitar, composers, and performers on stage or in the studio.
A middle-ground approach
Start simply: work on the main row first, then add accidentals one at a time. This gradual approach helps prevent discouragement.
A useful method is to introduce one accidental per piece or per key. That keeps learning practical and motivating.
When a chromatic model becomes essential
A practical choice: a diatonic model is often enough for relaxation and simple songs. A full chromatic model becomes useful for changing keys, jazz, classical music, or modern pop.
Time and orientation: choose short, regular sessions over sporadic practice. Avoid buying a complex instrument without a learning plan.
For more information and suitable learning materials, consult this kalimba resource.
What makes a 34-tine model different: double row, ergonomics, and handling
The double row changes how you hold and play the instrument. The front row provides the diatonic foundation. The back row contains sharps and flats; it is slightly offset to reduce mistakes.
Layout and orientation
Find the center first. Low notes are near the center, while high notes are toward the edges.
The back row completes the octave while staying within reach of your thumbs. Work from the center outward to develop tactile memory.
Proper grip and resonance
Rest the instrument in your palms, with your fingers supporting the back without squeezing. Keep your thumbs free and slightly curved so your nails can pluck the tines.
Important: do not cover the resonance holes beneath the body. Otherwise, the sound loses volume and clarity.
Weight, comfort, and build quality
A full model often weighs around 600 to 700 g. That is heavier than a simpler model.
For long sessions, sit in a stable position and use a nonslip support if needed. With this type of instrument, the quality of the tine alignment and stability matter more than a low price.
| Feature | Effect | Advice |
|---|---|---|
| Double row | Access to accidentals | Practice from the center outward |
| Posture | Endurance | Sit with open palms |
| Weight of around 600 to 700 g | Comfort | Use a nonslip support |
Preparing the instrument to play: markers, position, and your first clear note
Simple markers and a relaxed position make daily practice easier.
Visual markers for finding notes quickly
Simple method: put stickers on key notes: the center, the octaves, and the tonic for your tuning. Start with those points, then gradually add other markers.
Tip: avoid covering the surface with labels. Too many can hinder tactile memory.
Posture and stability
Sit with relaxed forearms and the instrument resting against your palms or lightly supported. Keep your thumbs flexible for precise plucking.
Stabilize the instrument with a nonslip pad or by resting it on your thigh. This reduces the small movements that cause mistakes and makes playing more comfortable on stage or in the studio.
Producing your first clear note
Pluck a tine with your nail, then release it immediately so it can vibrate freely. A clean pluck produces a clear, sustained note.
In practice: a few minutes of exercises focused on plucking and releasing are enough to feel the difference.
- Markers: start with a few key notes.
- Posture: sit with relaxed wrists.
- Stability: use a nonslip pad.
- Sound: pluck with your nail, then release.
Result: careful preparation speeds up learning, reduces mistakes, and makes practice more enjoyable. This guide will then help you move on to tuning and advanced techniques.
Tuning a 34-tine chromatic kalimba: tuner, hammer, and stability
Stable tuning starts with the right equipment and a simple method. On this full-range instrument, every note matters: a reliable tuner and a small tuning hammer are essential.
Essential equipment
In France, consider a chromatic tuner, either a clip-on model or a reliable mobile app, and a tuning hammer. Together, they are the minimum equipment you need.
Practical rule
Moving a tine changes the length of its vibrating section. Tapping the top of a tine lowers its pitch; tapping the bottom raises it. Remember this simple rule.
Step-by-step procedure
- Tune one tine at a time with the tuner.
- Aim for a stable pitch, then check the neighboring tines again.
- Repeat if an adjustment slightly changes another note.
Routine and care
Check the tuning regularly, weekly at first or before a recording. Check that the tines are aligned and clean to prevent unwanted buzzing.
Tip: gently clean contact surfaces, protect the wooden body from moisture, and store the instrument in a case. For a fuller reminder about equipment and good habits, see this practical guide.
34-tine chromatic kalimba: what is it for and how do you play it?
To learn steadily, work from the center outward and build your tactile memory.
A low-pressure method: start one note at a time on the front row, which forms the diatonic foundation. This makes the note layout clearer and prevents confusion.
Alternating thumbs is essential. Play in turn with your left and right thumbs to keep a steady rhythm. Sharing the work this way prevents tension and makes playing smoother.
To make a tine sound clearly, angle your nail downward, pluck near its free end, then release it. Check that the tine vibrates without touching its neighbor.
A short practical exercise
- For 5 minutes, slowly play the central notes while alternating thumbs.
- Then move toward the sides while keeping the same intensity.
- Finish by repeating a short, simple melody three times.
“Start simply, strengthen your tactile memory, then add accidentals.”
Why follow this plan: even while you begin on the front row, you are preparing your hands to move between rows. Once your melodies flow smoothly, add accidentals gradually to improve your kalimba playing.
Learning chords and enriching your playing
One simple movement can give a melody more body: plucking two tines together creates a basic chord. This small accompaniment can support a voice or the main melody without much difficulty.
Simple chords: pluck two tines at once, then alternate chords and melody notes. Find triads and consonant intervals; test what sounds right in your chosen key.
Arpeggios and chord changes
Arpeggios bring a chord to life. Play its notes one after another to preserve the harmony while creating movement.
Approachable counterpoint
Repeat a low note while the melody moves. This simple counterpoint creates effective polyphony without requiring extensive music theory.
Making use of the extended range
With a wide range, use low notes near the center and high notes toward the edges. This lets you create several parts and complete accompaniments without another instrument.
To improve: next, add an accidental to color a chord. This opens up possibilities for tension and resolution that we will explore later. To learn the basics of musical notation, see how to read sheet music.
Mastering chromatic techniques: smooth row changes and effects
Moving between rows calls for a light, precise movement to keep passages smooth.
A small adjustment: approach with your nail at a shallow, controlled angle. Make a short movement toward the back row, then return quickly to the main row.
Moving from one row to the other
To add sharps and flats without catching adjacent tines, make smaller thumb movements. A slight pivot is enough to reach an accidental and return.
Simple exercise: choose a key, identify one or two useful accidentals, then repeat a series of eight notes with a metronome at 60 beats per minute. Increase the speed when the series stays clean.
Alternating thumbs for speed and accuracy
Divide the notes between both thumbs: do not use just one thumb for the whole phrase. Aim for accuracy first, then increase the tempo.
Glissando and other effects
A glissando uses one continuous movement across several tines. Control the pressure to avoid a muddy sound, and choose passages where the effect serves the melody.
Effects using the resonance holes
If the body allows it, create vibrato or a wah-wah effect by partly covering the holes. Leave these openings clear during normal playing to preserve sound clarity.
Tip: if an effect harms your timing or the clarity of the sound, slow down and work on the movement again.
| Technique | Goal | Exercise |
|---|---|---|
| Moving between rows | Fluidity | Eight notes at 60 beats per minute, with one or two accidentals |
| Alternating thumbs | Consistent speed | Break up the phrase and repeat it slowly |
| Glissando | Expressive effect | Control the pressure and choose a suitable phrase |
| Resonance | Vibrato and wah-wah effect | Cover and uncover the holes, checking sound clarity |
Making steady progress with a realistic method and simple songs
Follow a short, focused routine to improve each day. Consistency works better than long, irregular sessions.
Short practice plan
Practice for 10 to 15 minutes a day: 3 minutes of scales, 3 minutes of rhythm while counting beats with a metronome, then 6 to 9 minutes on a melody.
Tip: work on one piece at a time so you remember it better.
Muscle memory and posture
Practice some passages without looking to make the movements automatic. Pay attention to your posture: flexible wrists, relaxed thumbs, and a stable instrument.
Useful resources
Use dedicated tablature or adapt piano or guitar sheet music. TablEdit and MobileSheets can help you organize your pieces.
Simple tracking: record your daily practice time and difficult passages, then increase the tempo in stages.
To go further, consult this guide and return to this easy-to-repeat plan each day.
Conclusion
This model combines the freedom to play in any key with a gradual learning path.
This kalimba lets you approach every key without retuning. The double row offers richer chords while remaining approachable: start with the front row, then add accidentals gradually to reduce mistakes.
Essential habits: keep a tuner and small hammer close by, check the tuning regularly, and avoid covering the resonance holes to preserve sound quality.
When choosing your instrument, prioritize tuning stability, ergonomics, and finish over price alone. A short, regular routine speeds up learning.
Checklist: good posture, clear resonance holes, markers in place, instrument in tune, and 10 minutes of practice: you are ready.