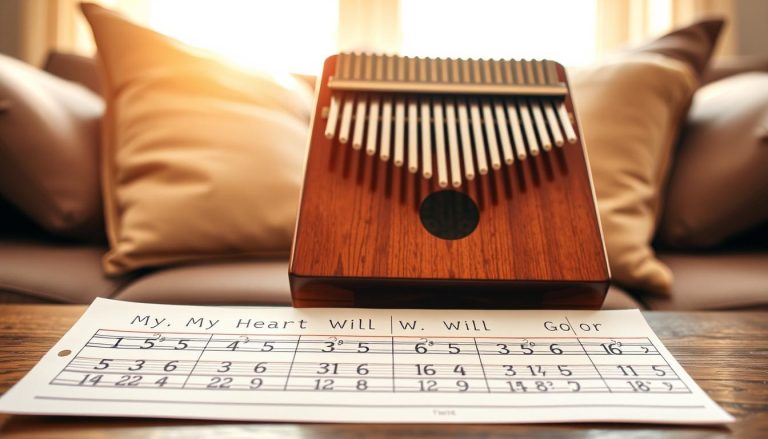
This guide will help you start playing a 7-tine kalimba quickly, even if you cannot read music. It follows a clear progression: discover the instrument → learn to hold it → tune it → read music → play a song.
By the end of this guide, you will know how to identify the notes, tune the instrument, read simple tablature and play your first melody. The approach emphasizes simplicity and practice.
Inside, you will find practical examples, tips for playing by ear, number and letter notation, and a famous song, “You Are My Sunshine.” This article is for beginners, curious readers and anyone looking for a soothing, portable musical instrument.
To learn more about reading tablature, see this useful sheet music reading guide.
Understanding the 7-tine kalimba and how a thumb piano works
The thumb piano appeals to players with its compact size and warm, enveloping sound. It is a lamellophone: metal tines of different lengths are attached to a body. Plucking a tine with your thumb produces a note whose pitch depends on the tine’s length and thickness.
The resonator box amplifies and colors the sound. It gives the instrument a warmer, almost “woody” tone. This makes tonal differences easier to hear when you are starting out.
Origins and development
This instrument has roots in Africa, notably in the mbira and sanza. Modern models have a simpler layout: notes are often arranged alternately from the center outward to make them easier to read and remember.
Why choose a compact model
For beginners, a smaller model means fewer notes to memorize. It slips easily into a bag and lets you learn melodies quickly.
| Feature | Advantage | Limitation |
|---|---|---|
| Metal tines | Range of pitches and precise touch | Limited note range |
| Resonator box | Warmer, louder sound | Sound depends on hand position |
| Compact size | Easy to carry and quick to learn | Smaller repertoire than larger models |
To explore the instrument’s history and different models, see this complete guide.
Preparing your instrument: how to hold it and identify each tine
Before playing, take a few minutes to hold your instrument correctly and identify each tine. A layout that alternates notes from the center outward makes them easier to memorize. The center tine often serves as a visual and tactile reference point.
Recognizing the note layout
Locate the 7 tines visually, starting at the center. Saying each note aloud as you move up the scale helps you remember it. Then play slowly, alternating your thumbs to strengthen the connection between the left and right sides.
Holding the instrument so the body can resonate
Recommended grip: curve your hands around the body, keep your thumbs free to pluck the tines, and avoid covering the sound holes. Do not squeeze the body, as this dampens its resonance.
Try an experiment: play a note while squeezing the body, then release your grip. The difference in how long the sound rings is clear and shows why this grip helps.
- Short routine: spend 2 minutes identifying the tines,
- 2 minutes slowly alternating your thumbs,
- and 1 minute trying a short melody.
Practical tip: repeat this routine every day to memorize the notes and improve thumb mobility.
Tuning a 7-tine kalimba to C major to make learning easier
Good tuning makes learning easier and prevents frustration during your first attempts.
Why choose the C major scale? It is the most common reference point. It lets you follow many simple scores and quickly connect letter names with numbers.
Essential note equivalents
The scale is C‑D‑E‑F‑G‑A‑B. Some resources also use numbers. Knowing both systems helps you read sheet music or tablature.
Step-by-step method
- Isolate one tine and pluck it gently.
- Open a tuning app, such as Smart Kalimba or gStrings, in a quiet room.
- Read the display and adjust the pitch by tapping the tine lightly.
- Check each note, then play the entire scale again.
Adjustment technique and mistakes to avoid
Tapping a tine toward its mounting point lowers the pitch; tapping it toward its free end raises the pitch. Use a suitable small hammer and avoid striking hard, which could damage the tine.
Common mistakes: background noise, an unsuitable hammer or a single mistuned tine that makes the whole scale sound wrong. For detailed instructions, see how to tune a kalimba.
7-Tine Kalimba: Learn the Basics with Simple Sheet Music
Knowing the difference between sheet music and tablature makes your first steps in music easier.
Sheet music and tablature serve different purposes
Sheet music shows the pitch and duration of notes using standard notation. It is useful if you want to understand rhythm and music theory.
Tablature shows you directly which tines to play. It is ideal for learning without reading standard notation.
Number and letter notation
A useful correspondence is 1‑2‑3‑4‑5‑6‑7 = do‑re‑mi‑fa‑sol‑la‑ti. Numbers make the notes quick to read.
Letter notation, C D E F G A B, helps you connect what you play with music theory as you progress.
Octaves, chords and practical cues
Depending on the source, octaves are marked with °, * or ’. Notes played together are written in parentheses or joined by a dash.
- Play with both thumbs at once to form a chord.
- If the notes are on adjacent tines, you can use a glissando.
- Highlight repeating patterns and mark the strong beats in pencil.
To learn how to read visual tablature, follow our practical guide on how to read sheet music, and discover useful kalimba tablature to help you progress.
How to read visual kalimba tablature and follow the rhythm
Read visual tablature like a map: each column guides your thumbs.
Each vertical lane represents a tine. Symbols in those lanes show which notes to play and their duration.
Reading from bottom to top and following the sequence
Start by reading each column from bottom to top. When several columns form a sequence, follow them from left to right to track the musical progression.
Understanding the essential symbols
Rests: do not play when a symbol indicates a rest.
Duration: a long note is marked differently from a short one; pay attention to the spacing between symbols.
Ties: hold the note without playing it again. Notes aligned horizontally indicate that you should play with both thumbs at once, producing two notes or a chord.
Common effects and movements
To create vibrato, gently move your thumb after plucking the tine. A wah-wah effect comes from a controlled movement of the body or a change in hand position that alters its resonance.
Keeping time without counting constantly
Begin with a metronome, then feel the strong beats to develop an internal pulse. A recommended rhythmic progression is:
- steady quarter notes,
- adding eighth notes,
- practicing ties to play more smoothly.
Quick tip: record yourself for 30 seconds, listen for timing differences and correct only the measure causing trouble.
| Element | Meaning | Recommended action | Example |
|---|---|---|---|
| Vertical column | Tine reference | Read from bottom to top | Marked lane = note to play |
| Horizontally aligned notes | Simultaneous playing | Use both thumbs | Chord or two notes |
| Tie | Hold the note | Do not play it again | Extend its duration |
To get better at reading tablature in context, follow this guided example and repeat it slowly before increasing the tempo.
Play your first melody: “You Are My Sunshine” on a 7-tine kalimba
A recognizable first song helps you build confidence and play more consistently.
Recommended tuning: E‑G‑A‑C‑D‑E‑G. Check every note with a tuner: play the tine, read the display, then adjust it.
Number version
Start with simple note sequences: 3-2-1-2-3-3-3 / 2-2-2-3-5-5. Practice each phrase slowly.
Letter version
Match each number to its note, for example, 3 = E, 2 = D and 1 = C. This conversion helps you memorize notes and prepares you to read standard notation.
Tips for playing more smoothly
- Break the song into short phrases of 2 to 4 measures and repeat them.
- Anticipate each thumb movement for clean transitions.
- Use a light glissando across two neighboring tines to connect notes.
- Start slowly, then increase the tempo in steps of 5 BPM.
A useful example: repeat one phrase 10 times without a mistake before adding the next. For more resources and sheet music, see this Jingle Bells score.
Basic techniques for a clear sound and expressive melodies
Good technique turns a simple sequence of notes into an expressive musical phrase. Start with a comfortable posture: relaxed shoulders, wrists in a neutral position and the instrument steady against your palms.
Hand position: curve your hands around the body and let your thumbs move freely without pressing too deeply. This grip reduces fatigue and preserves each tine’s resonance.
Role of the thumbs: alternate your right and left thumbs to keep a steady, fluid rhythm. A controlled pluck prevents a note from snapping or sounding muffled.
Light touch and plucking angle
Aim for light, clean contact. Try two angles: about 45° for a warmer sound, then a more upright angle near 90° for a brighter tone. Listen to the difference and choose what suits the song.
Controlling note length and articulation
A quick release produces staccato. Letting the tine vibrate produces a sustained note. Add pauses like musical breaths to make the phrase clearer. Keep the force of each pluck consistent for an even sound.
A quick exercise and a routine to prevent fatigue
Exercise: play a short scale, alternating sustained and staccato notes. Repeat for 5 minutes, take a short break, then start again. Stop as soon as you feel tension.
To build on your practice, follow these basic exercises to strengthen your technique and improve endurance.
Progress quickly with a simple routine and useful resources
For quick progress, a short, focused routine works better than long hours of unstructured practice.
A 10 to 15 minute beginner routine: 3 minutes of warm-up, 5 minutes of rhythm practice with a metronome, 5 minutes on a song, and 2 minutes of listening and correcting.
Short exercises: repeat a pattern for 30 seconds while alternating your thumbs, then aim to play it more evenly. Practice with a metronome and record your progress.
Printable PDF scores: print them on A4 paper in landscape orientation. Paper weighing 120 g/m² is recommended so you can write on and handle the sheets without damaging them. Mark fingerings and sections to repeat for learning away from a screen.
Video tutorials and apps
Slow-motion videos help you copy the movement and correct your timing. To tune the instrument, use an app such as Smart Kalimba, gStrings or Tuner Lite.
| Goal | App | Use |
|---|---|---|
| Tuning | Tuner Lite / Smart Kalimba | Quick adjustments |
| Tablature | Kalimba Real | Music library |
| Recording | MyKalimba | Analysis and playback |
How to measure your progress: choose one song each week, divide it into phrases, and master each phrase and its tempo before speeding up.
Build a folder of resources, including PDFs, videos and tuning settings, to learn more, save time and organize your practice.
Conclusion
This final section recaps what you have learned and suggests the next steps.
We have covered how to understand the instrument, prepare it, tune it, read music and play a first melody. With this approach, playing is accessible even if you cannot read standard notation.
Practice a little every day: 10 minutes regularly is better than an occasional long session. Focus first on a clear sound and note length, then increase the tempo.
Next, choose 2 to 3 melodies to practice. Alternate between reading tablature and sheet music and playing by ear. Check the tuning often: one mistuned note can affect the whole piece.
Then explore other notation systems, PDFs, videos and reliable apps to expand your music library and progress at a comfortable pace.