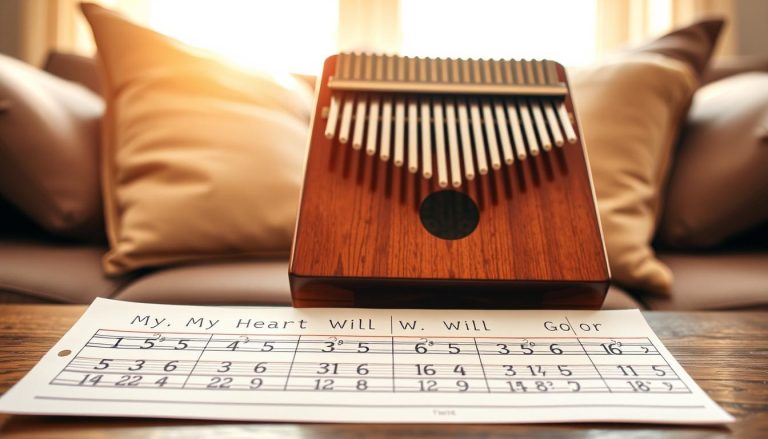
Goal: help you play Happy Birthday on a 17-key instrument today with a clear, quick method.
This guide is for beginners, parents preparing a party, and occasional musicians who want a polished result without knowing how to read music. It explains the tine layout, tuning, and how to read the notation.
It offers three practical formats—numbers, letters, and tablature—along with a printable PDF. Each format is explained so you can choose one that suits your level.
What to expect: simple sections, short practice sessions, and a step-by-step routine to help you give your first performance the same day. Checklists and pointers will help you avoid common mistakes.
For the sheet music and PDF, visit the dedicated page: guide and sheet music.
Why “Happy Birthday” is ideal for a 17-key kalimba
Few songs offer such a quick and rewarding start. The melody is short, repetitive, and easy to memorize. It sounds expressive even at a slow tempo, making it perfect for beginners and family celebrations.
Playing this song lets you join a celebration right away with a compact instrument that has a delicate sound. Its social appeal also boosts motivation: a familiar tune encourages regular practice from the first week.
What beginners look for
They want a clear, free resource that does not require them to read music. Learning should be quick: understand the piece, practise it, and play it that day.
Available formats and what they offer
- Numbers: perfect for starting without any musical knowledge.
- Letters: useful if you already know the note names.
- Tablature: shows each tine and makes leaps easier.
- Printable PDF: handy for making notes and practising without a screen.
| Format | Benefit | Best for |
|---|---|---|
| Numbers | Start learning right away | Complete beginners |
| Letters | Matches note names | Musicians familiar with notes |
| Tablature | Visual guide to the tines | Visual learners |
| Print and annotate | Everyone |
What you need before playing a 17-key kalimba
A quick equipment check prevents mistakes and helps you progress faster. First, make sure your instrument matches the sheet music: a standard 17-key kalimba. This ensures the notes shown correspond to the tines you have.
Wood or acrylic: how they affect sound and feel
Wood: it has a warmer tone rich in overtones. It absorbs vibrations better and feels comfortable to hold.
Acrylic: a brighter sound, a modern look, and better resistance to knocks. The instrument is often steadier on a table.
Useful accessories for getting started
- A tuning hammer to adjust each tine, essential for accurate tuning.
- A case or pouch to protect the instrument when travelling.
- A soft cloth to clean the tines and keep the sound clear.
- Stickers or coloured markers: an easy way to find your place at first.
For a practical choice, prioritize availability and an instrument that is easy to tune over one that is purely decorative. A little preparation will prevent most frustrations: wrong notes, slipping tines, or a lack of visual markers.
For the sheet music and accompanying PDF, see our guide and sheet music.
Tune your kalimba to avoid wrong notes
Before playing, take a few minutes to check the pitch of the notes. Accurate tuning makes all the difference: one wrong note can make a familiar melody hard to recognize.
Step-by-step tuning with a tuner app
Install a tuner app on your smartphone. In a quiet place, pluck each tine and look at the note displayed.
Work in order: start with the centre tines, then move outwards. Each tine corresponds to a note. Adjust it until it consistently produces the desired note.
Make small adjustments without forcing anything
To raise a note’s pitch, push the tine slightly inward; to lower it, pull it out very slightly. Use gentle taps with the hammer and check the note after each adjustment.
A “few minutes before playing” routine
- Check a few key notes, particularly in the centre and at the fifth.
- Then quickly check every tine if you have transported the instrument.
- Finish by playing the opening phrases to check how everything sounds together.
Common mistakes and quick fixes
- Hitting too hard: reverse the adjustment and use a smaller movement.
- Moving a tine too far at once: make small adjustments.
- Forgetting nearby tines: check them again after each adjustment.
Understanding the kalimba tine layout: landmarks and patterns
Knowing where the tines are makes a short melody much easier to learn.
Find the centre tines and follow the rise in pitch
The centre tine is often a useful reference point. The basic notes are arranged around it.
From the centre, the notes rise in pitch as you move outwards, alternating between left and right. Knowing this pattern prevents hesitation when the melody jumps between notes.
Memory aids: visual markers, colours, letters, and numbers
Mark key tines with colours or stickers, then gradually remove the markers.
- Find the centre tine and its immediate neighbours.
- Number or label each tine to build a mental picture of the instrument.
- Play short sequences of three or four notes to train your ear.
Move on to reading notation: once you understand the layout, numbers, letters, and tablature become more intuitive. For more detail, see our tine layout guide.
Learn to read kalimba sheet music without reading standard notation
An intuitive reading system turns notation into actions. You do not need to read standard music notation: follow the symbols, find the tine, then steady the rhythm by counting the beats.
Reading numbers: matching notes to tines
Numbers tell you which tine to play. Add numbered stickers to find a sequence of notes quickly, and practise reading three numbers at a time.
Look ahead for repeated patterns and returning phrases. This makes learning easier and reduces pauses during your performance.
Reading letters: another practical option
If you already know do, re, mi or A, B, C, letter notation may feel more natural. It helps you avoid transposition mistakes.
To keep the systems clear, leave a key on your sheet music and return to numbers when needed.
Understanding rhythm and note length
Count the beats aloud and use a metronome. Observing rests and note lengths matters more than playing quickly.
Aim for consistency: a steady tempo makes the melody recognizable and the notes easier to remember.
Annotate the music to learn faster
Mark which thumb to use, where to breathe, and where to slow down. These personal notes make the music easier to follow.
Annotations reduce stops, improve fluency, and help you decide which format suits you: numbers, letters, or tablature.
Choose the right format to progress quickly: numbers, letters, or tablature
Choosing just one format at first reduces confusion. It helps beginners build confidence and make quick progress.
When to choose numbered sheet music
Number notation is ideal for beginners. It takes little mental effort and lets you learn the melody in a few minutes.
When to choose letter notation
Choose letters if you already know the notes from another instrument. They make it easier to connect playing with music theory.
Why tablature is useful
Tablature shows the tine layout. It makes jumps and finger positions easier to spot. It is a good choice if you rely on visual memory.
A method for moving between versions: begin with a short version for a quick success. Move to the full version once reading and coordination feel smooth.
- One format at first: fewer mistakes.
- A short checklist: your current level, available time, and goal.
- Visual preference: text for numbers and letters, diagrams for tablature.
To explore the method further, read the complete guide or try an arrangement for another instrument in this practical ukulele guide.
Easy Happy Birthday kalimba sheet music for 17 keys
The melody breaks down into short, memorable phrases that are ideal for learning quickly.
Melody structure: the song has four short phrases with two natural repetitions. Each phrase begins at a simple landmark: the opening, the rising phrase, the cadence, and the resolution.
Key notes and transitions
Jumps to higher notes and returns to the centre are the trickiest passages. Find them on your instrument and repeat them slowly.
When to slow down: at the start of a new phrase, just before a jump, and on sustained notes that act as turning points. Slowing down improves accuracy and helps you keep your place.
Short and full versions
Short version: keep the essential melody so you can play it quickly at a party. Play just two phrases and repeat them until you feel confident.
Full version: once you can play accurately, put all the phrases together at a steady tempo with gentle changes in volume.
| Goal | Content | Practical tip |
|---|---|---|
| Start right away | 2 phrases: opening and rising phrase | Learn one bar at a time |
| Make progress | Add the cadence | Repeat the transitions that need work |
| Play the full song | 4 phrases with expression | Steady the tempo with a metronome |
The next section offers a step-by-step way to turn the sheet music into your first performance. Prepare your instrument and choose the format that suits you: numbers, letters, or tablature.
Play “Happy Birthday” on the kalimba: a step-by-step method
Start by breaking the melody into small, manageable passages.
Begin slowly: play one bar at a time. Work on two bars, then join them into a short sequence. Move on only when you can repeat them smoothly.
Manage tempo and rhythm
Count the beats quietly. Then use a metronome app on your smartphone. Increase the speed only when the rhythm is completely steady.
Coordinate your thumbs
Alternate thumbs when it feels natural. Get the next thumb ready before playing the note. Aim for even attacks and avoid plucking too hard so you stay accurate.
Handle tricky passages
Isolate troublesome passages lasting 2 to 4 seconds. Repeat them 10 times, take a short break, then put them back into the melody. This focused repetition helps you progress quickly.
Quick plan: play the song in a few minutes
- Quickly check the tuning.
- Play the short version of the song.
- Add the missing phrase.
- Play the whole piece once without stopping.
Progress tip: if you get stuck, return to the previous bar instead of starting again from the beginning. This keeps you motivated and speeds up learning.
Tips for a better sound with less effort
Simple movements improve your sound and make playing easier.
Posture and how to hold the instrument
In your hands: hold the instrument near its centre to maximize resonance. Your palms should form a relaxed cavity beneath its body.
On a table: set the instrument down for more stability while practising or if you feel nervous before performing.
Touch and dynamics
Relaxed thumbs, aligned wrists, and a centred instrument help you play more accurately.
Pluck each tine with a short movement. Avoid striking it: a controlled movement produces a warmer tone and reduces fatigue.
Practise dynamics: play the phrases louder at first, then more softly, to balance the volume of the centre and outer tines.
Care for a clear sound
Always wipe the tines with a soft cloth after use. Avoid moisture and store the instrument in a pouch.
Preventing oxidation helps preserve a clear tone. A clean instrument is quicker to retune and remains pleasant to play.
Practical tips:
- Quickly check the tuning before each session.
- Clean and put away the instrument after 10 to 15 minutes of practice.
- Listen to how long notes ring so the melody stays clear.
Download the sheet music PDF and print it clearly
Download the free PDF and prepare a clear printout so you can start playing in minutes.
Why choose the PDF? It gives you immediate access, works offline, and lets you annotate the sheet music. You can file the page and take it anywhere.
Recommended print settings
Print on A4 paper at 100% scale without automatic resizing to preserve the layout. Choose high contrast so the numbers, letters, and tablature are easy to read.
Checks before printing
- Check that the diagrams and text are legible from where you will play.
- Check the margins so notes or markers are not cut off.
- Print a test page: if everything is clear, print the final copy.
A practical way to organize your pages: put the short version in front and the full version behind it. Add a reference sheet and your own annotations to save time during practice.
Tip: quickly check the tuning before playing from the printed sheet. This helps you tell a tuning problem from a printing problem.
To download the free PDF and other resources, see our guide and sheet music. Instruments du Monde offers many free scores and tabs to expand your repertoire.
Use a video tutorial to learn faster
A focused video lets you copy the movements you see in just a few minutes. It combines picture and sound to make reading and practice easier.
Match the audio to the sheet music
Listen to the melody once to hear its sequence and rhythm. Then play the video while following the numbers or tablature on your sheet.
Mark the strong beats and note where the video repeats a passage. These landmarks make it easier to follow along.
Effective ways to progress
Use slow playback to watch each pluck and how the thumbs alternate. Then repeat the passage slowly before speeding up.
Loop practice: isolate one or two difficult bars and repeat them continuously. Then connect them to the whole phrase.
Compare slow and fast playing: keep your accuracy, then increase the speed in stages.
A short, effective 5-minute session
- 1 minute: listen to the whole piece.
- 3 minutes: loop the passage you are working on.
- 1 minute: play continuously to check your progress.
Tip: to download the materials and follow the steps, see the guide and sheet music. This method makes learning easier and helps you progress quickly.
Cultural background: the history of “Happy Birthday” and famous versions
Understanding the origins of this melody helps explain its cultural reach and many adaptations.
Origin: in 1893, sisters Patty and Mildred Hill wrote a short educational song, Good Morning to All, which later became Happy Birthday to You. A commercial recording existed by 1912.
From the Hill sisters to worldwide popularity
The melody’s simplicity helped it spread. The words and title changed, and the tune became familiar around the world.
Notable performances
- Marilyn Monroe in 1962: a famous, widely publicized performance.
- The Beatles in 1963: a public performance that strengthened the song’s place in pop culture.
- Apollo 9 in 1969: a performance beyond Earth, symbolizing its universal appeal.
“A simple tune can cross ages and cultures.”
Rights and sharing: long managed by Warner/Chappell, the song entered the public domain in 2015. You can now play, teach, and share arrangements without commercial restrictions.
In practice, this background helps explain the wealth of notation, tablature, and arrangements available. Once you have mastered the easy version, try other tempos, keys, and small ornaments to make the performance your own. For sheet music and resources, see the dedicated page: guide and sheet music.
Conclusion
A short plan makes playing easier: prepare the instrument, tune it quickly before playing, find the tines, and choose a reading method: numbers, letters, or tablature.
Follow the steps one by one: tune, learn the phrases, and repeat the passages that need work. This simple method prevents mistakes and saves time.
Print and organize your sheet music, then add other songs to stay motivated. With a few minutes of focused practice, “Happy Birthday” becomes a chance to share music.
Tips: stick with one format for a few days, aim for steady playing first, then refine the volume and expression to hear your progress.